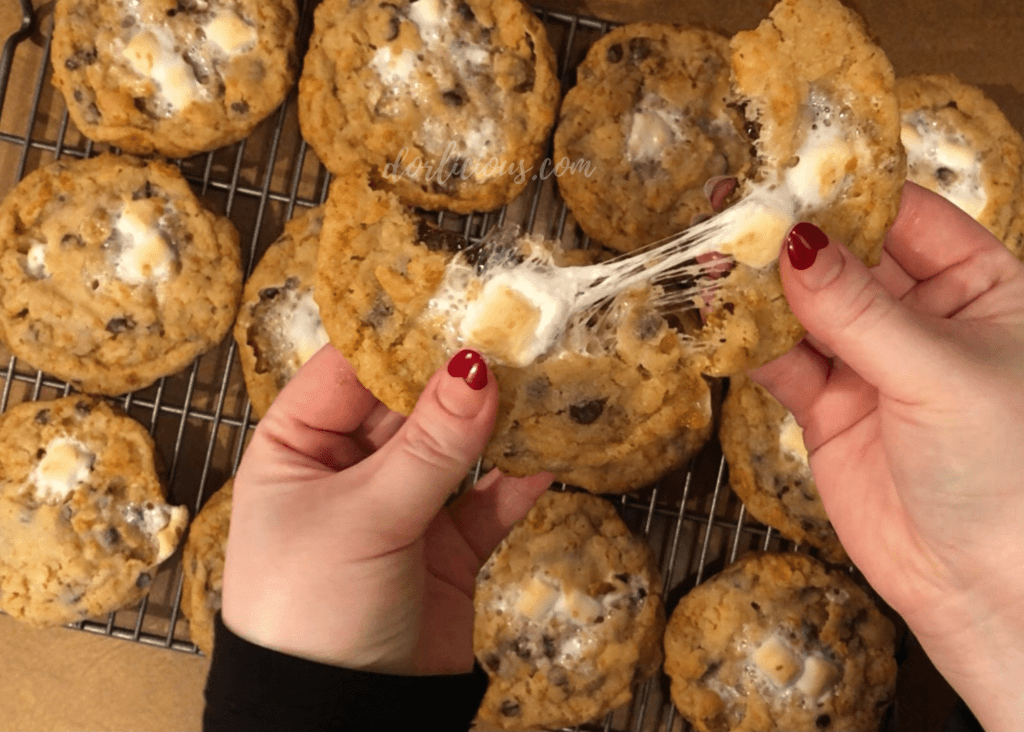
I love love love this recipe! I am obsessed with Milk Bar & love Christina Tosi’s story. Since I do not live anywhere near a Milk Bar location, I started making these cookies at home. I followed Christina’s recipe to a-freaking-tee and was beyond disappointed with the results. The cookie was over baked, the marshmallows were completely dissolving, this was not the cookie I had envisioned. I watched her make them herself, followed the ingredients to the gram, and realized it wasn’t the ingredients but the baking instructions!! After many tests of baking these off from refrigerated, from frozen, at different temperatures and bake times, I have mastered the perfect cookie. The dough absolutely needs to be frozen before baking to achieve the perfect cookie & melty marshmallow. Another thing I learned is if you hand place the marshmallows (I know, that sounds ridiculous, hand placed marshmallows for a cookie? But trust me, you will thank me later), these cookies turn out a million and one times better. Otherwise, you end up with lacy marshmallow caramel all over your baking sheet, which is fine if you don’t mind, but you lose the integrity and structure of the cookie when this happens. You are more than welcome to paddle the marshmallows into the dough, but if you want them to be absolutely perfect, hand place them in!!
As with a lot of baking recipes, this recipe is best when you measure it out in grams! I could shout this from the rooftops. Not all recipes will be drastically different if you don’t weigh out your ingredients, but this recipe really is best when you do. If you don’t have a kitchen scale, I highly recommend buying one as they are extremely useful and you will yield better results when baking. I have the cutest pink Escali scale which you can find here. You will also absolutely need a stand mixer as the ingredients are creamed together for pretty much 10 minutes straight, so unless you are a professional body builder with incredible upper-body strength, I don’t recommend doing it by hand.
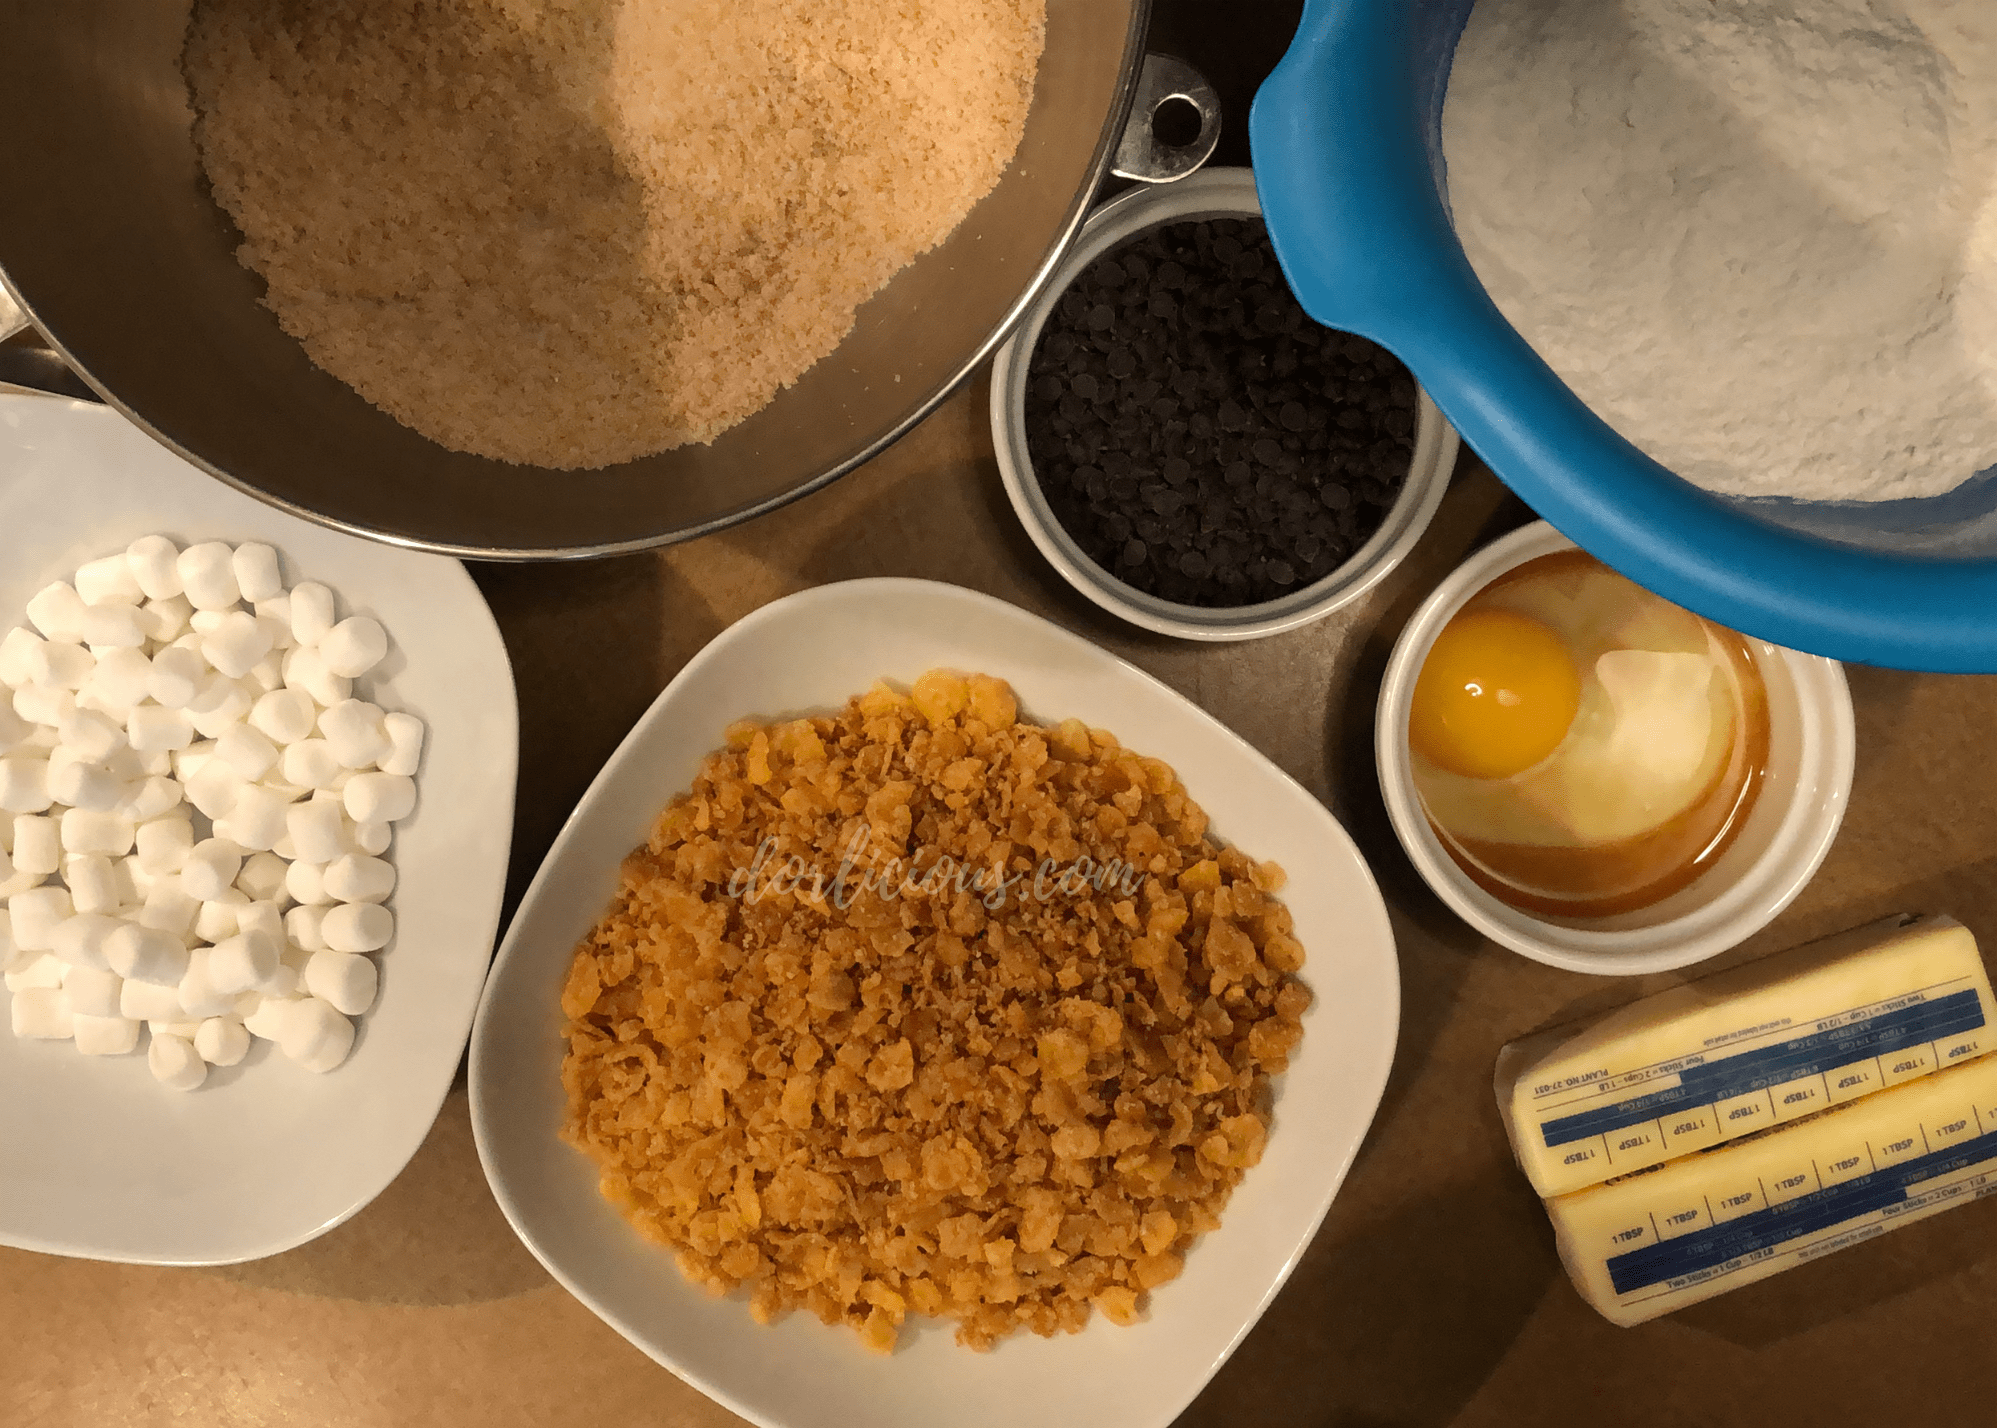
Ingredients:
For the Cornflake Crunch (makes about 360 g or 4 cups):
- 170 g (5 cups) cornflakes
- 40 g (1/2 cup) milk powder
- 40 g (3 tbsp) sugar
- 4 g (1 tsp) kosher salt
- 130 g (9 tbsp) butter, melted
For the cookies:
- 225 g (16 tbsp) butter, at room temperature
- 250 g (1 1/4 cups) granulated sugar
- 150 g (2/3 cup, tightly packed) light brown sugar
- 1 egg
- 2 g (1/2 tsp) vanilla extract
- 240 g (1 1/2 cups) flour
- 2 g (1/2 tsp) baking powder
- 1.5 g (1/2 tsp) baking soda
- 5 g (1 1/2 tsp) kosher salt
- 270 g Cornflake Crunch (3/4 the recipe or 3 cups)
- 125 g (2/3 cup) mini chocolate chips
- 65 g (1 1/4 cup) mini marshmallows
- Note: I don’t recommend going the fancy-schmancy marshmallow route here
Directions:
- First, prepare the Cornflake Crunch. Preheat the oven to 275°F. To a medium bowl, add the cornflakes, and crush them with your hands to break them up into pieces about half to a quarter of their original size (you don’t want them to be too small). Add the sugar, salt, and milk powder to the bowl and stir to coat. Add in the melted butter and stir to coat. Spread on a parchment lined baking sheet in a fairly even layer and bake for 20 to 25 minutes, until they are lightly toasted and still have some crunch to them when they are cooled. Allow them to cool completely before using. You will only need 3/4th of what you make, and they will last for about a week at room temperature in an air tight container.
- Now for the cookies, in a medium bowl, whisk together the flour, baking soda and salt.
- Combine the butter and sugars in the bowl of a stand mixer. Using the paddle attachment, cream together on medium-high for 2 to 3 minutes. Scrape the sides of the bowl down, then add the egg and vanilla. Beat on medium-high for 7 to 8 minutes. (Don’t skip or cut this step short!! It is absolutely essential that they beat together for that long so that it can fully aerate and emulsify.) Scrape down the sides of the bowl.
- To the bowl of the stand mixer, add the pre-mixed flour, baking soda, baking powder and salt. Mix on low speed just until the dough comes together, which should be no longer than 1 minute. If you mix for too long, you will end up over mixing the dough, so don’t walk away, and set a timer if needed. Scrape down the sides of the bowl.
- Add in the Cornflake Crunch and mini chocolate chips, and mix on low speed (I like to use the “stir” setting on my mixer), until they are just incorporated, which should be no longer than 30 to 45 seconds. (If you are choosing to not hand place the marshmallows, add them to the bowl of the stand mixer now and mix them in on low speed until just incorporated.)
- Add a couple of marshmallows to a 2-ounce portion scoop, then add in a layer of dough, add in a few more marshmallows, then more dough until you have 2 ounces. You want to layer them so that no marshmallows are exposed on the sides of the cookie, only the top. If you run out of marshmallows doing it this way, just use more. Repeat until you have used all of the dough. (I typically do 2 to 3 marshmallows on the top, and 2 to 3 in the center. Watch me assemble the cookies in my video for clear demonstration.)
- Tip: I like to use my portion scoop but also weigh the dough out while I am doing it for more uniformity. A cookie anywhere between 2 to 2.10 ounces is fine and will bake the same!
- Note: If you don’t have a portion scoop, you can weigh out 2 ounces of dough, or measure out about 1/3 cup of dough. If you’re not using the portion scoop, form the dough into a ball, and gently flatten the bottom of the dough, leaving a rounded top.
- Place the portioned cookie dough on a baking tray or a plate that can go into the fridge. Cover the cookies with plastic wrap and chill in the fridge until the dough is firm, about 30 minutes to an hour. Once the dough has fully chilled, move the dough into a plastic bag and put it in the freezer for at least 1 hour or until they are fully frozen. (If you don’t allow the dough to chill first, they will stick together in the bag.) This is the most important part! Freezing before baking ensures that the marshmallow doesn’t completely dissolve during baking. Do not bake the cookies from room temperature, do not bake the cookies from refrigerated, trust me!! They will not hold their shape and the marshmallows will melt away while baking. From here, you can leave the cookies in the freezer to bake off as needed for up to three months or proceed to the next step.
- Heat the oven to 350°F.
- Place the cookies from frozen on a parchment lined baking sheet. Make sure to place them at least 4 inches apart. (If you’re using a half-sheet pan, I usually bake four on one sheet at a time.)
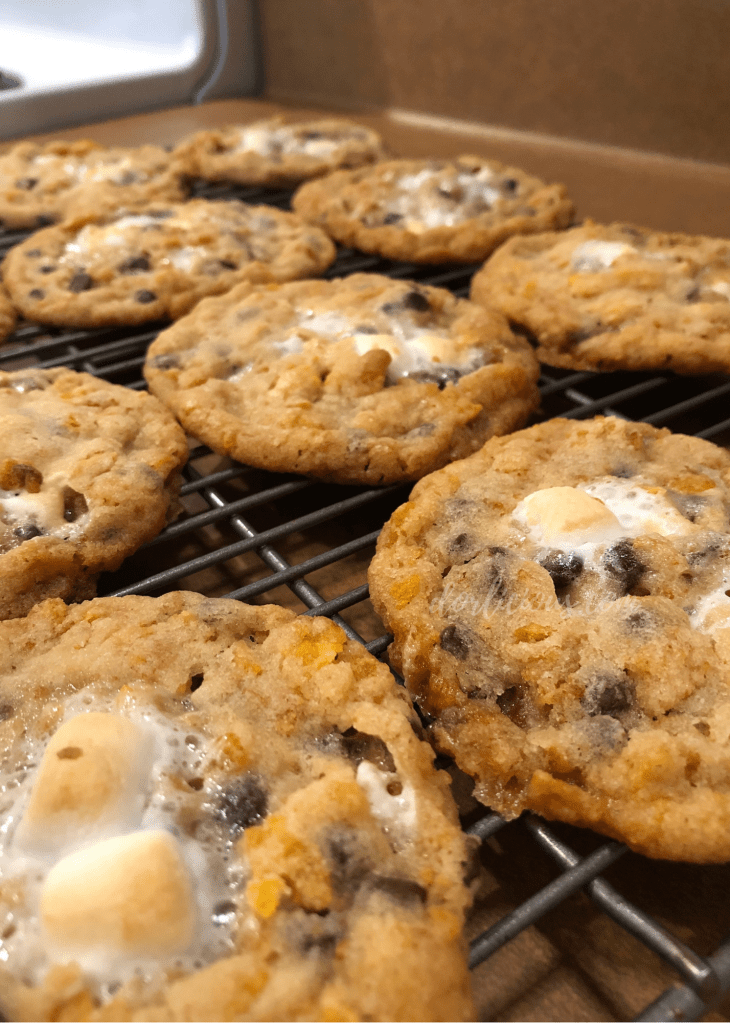
- Bake the cookie for 15 minutes, or until the edges are beginning to turn a light golden brown. They should still be on the pale side, a little puffy, and the marshmallows should look slightly melty but still intact and toasted.
- Leave the cookie on the pan to cool completely (it will continue to bake using the residual heat from the pan). The cookies’ edges will turn a deeper golden, the cookie will flatten and look more uniform.
- Repeat steps 8-10 until you have baked all your cookies.
- The cookies will keep at room temperature in an airtight container for about 5 days. When they’re not fresh from the oven, they are best served after you’ve microwaved them in the microwave for 10 to 15 seconds.

I followed your recipe and shared the cookies with friends! I’m so glad I found your video bc I was going to follow Christina Tosi’s but then YouTube showed me your video and I appreciated all the pointers you had, thank you! I froze the dough over night and baked half of them for friends and the other half is ready to bake in the freezer. Some marshmallows melted away but the presentation on top was such a nice touch, solid tip because I followed you and manually added them into each scoop. Thank you!
LikeLike
I am so happy to hear this!! I was so frustrated by the recipe when they melted away and were nothing like what I expected. I am glad you were able to enjoy them! -Dorina
LikeLike
hello! Can I freeze the dough balls a couple days in advance, then just bake them when needed? Or is it possible to “over-freeze” the dough?
LikeLike
Hi Shannon, you can freeze in advance and still bake without issue. You may need to adjust the bake time slightly to account for the fact that the cookies are frozen solid. Usually this only adds a few minutes extra but varies by oven.
LikeLike